In the last weeks, I had to work more and more on VMware Cloud on AWS, more specifically I had to play with the API of NSX on VMC. I never setup postman to query NSX API on VMC, so I thought it would be useful to go to the bottom of it and I did not get disappointed 🙂
First, to query NSX API, I use Postman, it’s a fantastic tool to help you make RESTful API calls, I strongly recommend it. You can save your API queries, re-use them, analyze the response, you can even script before and after doing your API calls.
As I also do API calls to NSX on-prem, I wanted to setup Postman in a way so I can easily switch between the two environments. I started with setting up an environment in Postman dedicated to my VMC setup:
1. Get the API token
Let’s dig into the problem now. In order to use NSX API on VMC, I need to authenticate my API calls. I can be done in two ways:
- First, just like on-prem you use an NSX user/password, but you need a Direct Connect to your SDDC or a VPN connection. I don’t have that and I don’t want to set it up.
- Second choice, you use Internet access, in this case you need to use an authentication token to CSP, the centralized authentication platform for all cloud services from VMware. This is the mechanism I will describe in this post.
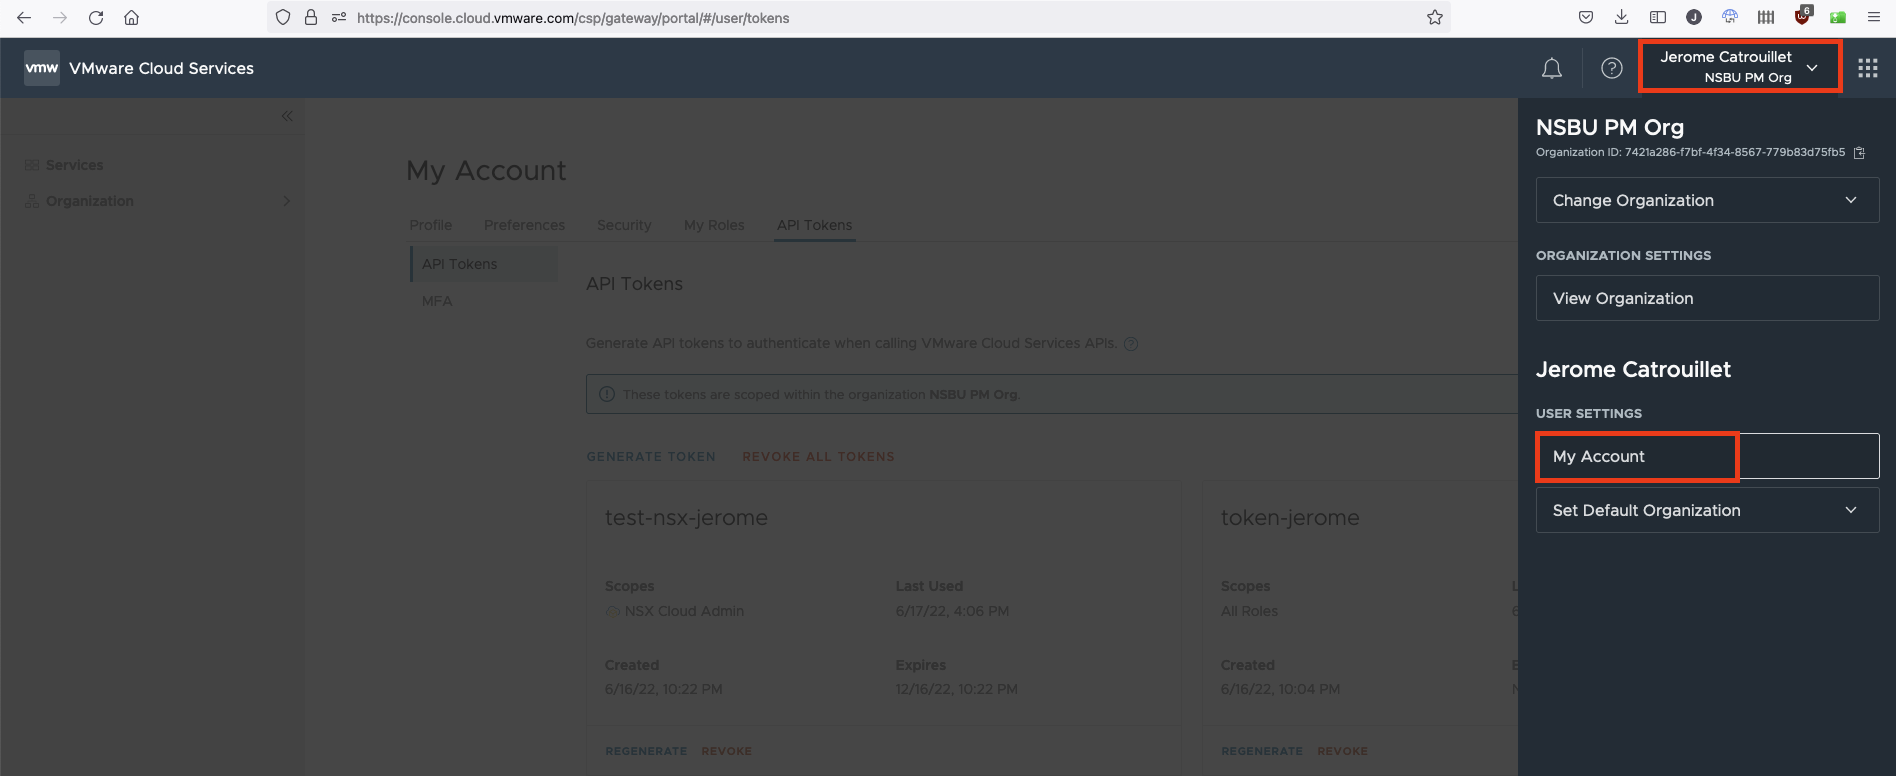
Before you can get an authentication token, you first need an API token. To generate an API token, you need to login to the VMware Cloud console, click on your name at the top right menu and select Account:
From there, you click on API Token and you can select GENERATE TOKEN:
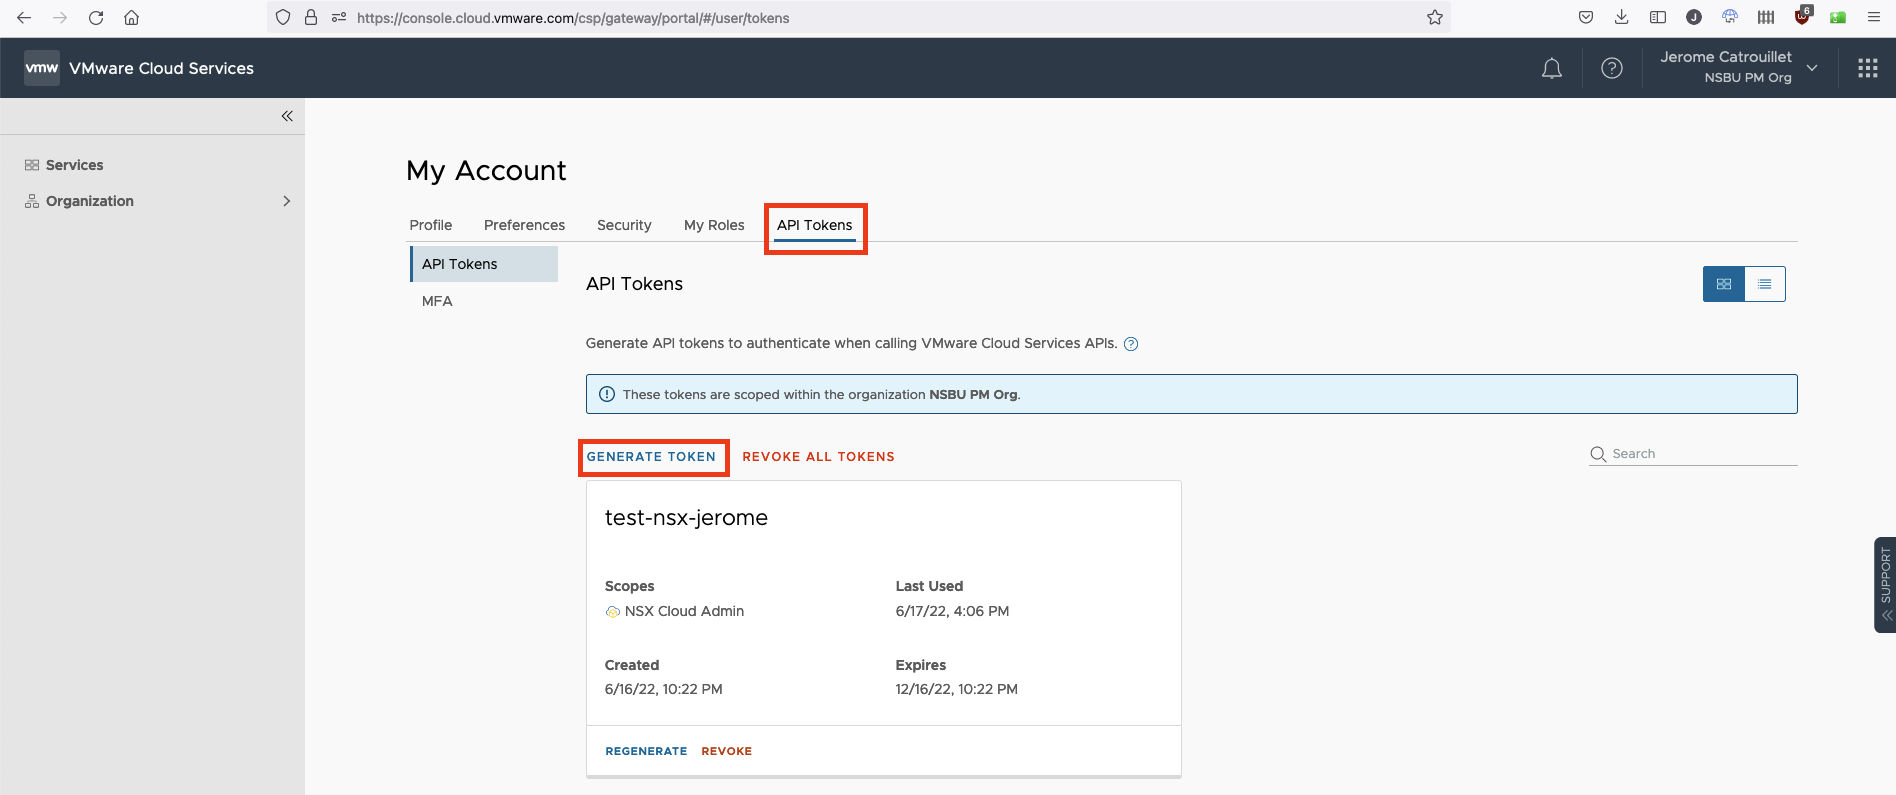
You give a name to your token, then you select the scope of the token, as I’m only interested by NSX API, I selected VMC on AWS and NSX Cloud Admin and finish by clicking Generate.

That’s it, you have a token:
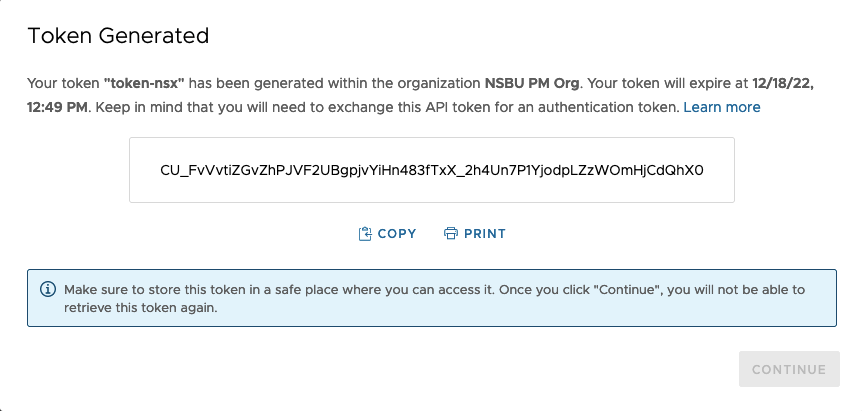
Save it preciously, this is the only time it will be displayed to you!
You can do way more things with tokens, please refer to the VMC documentation for more details: https://docs.vmware.com/en/VMware-Cloud-services/services/Using-VMware-Cloud-Services/GUID-E2A3B1C1-E9AD-4B00-A6B6-88D31FCDDF7C.html
2. Get an authentication token
You could think that now we are done now, we could simply use this token in the NSX API call. Unfortunately no, we have to ask for an authentication token based on our API token.
To do that, simply use postman.
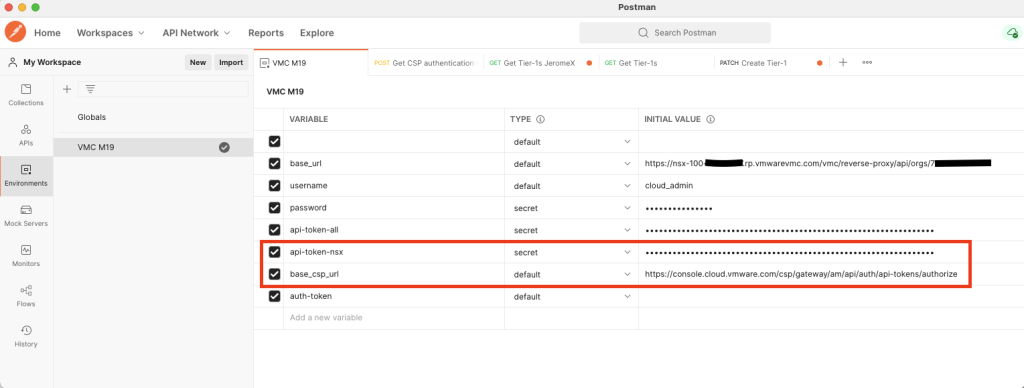
Create an environment in Postman for your VMC setup:
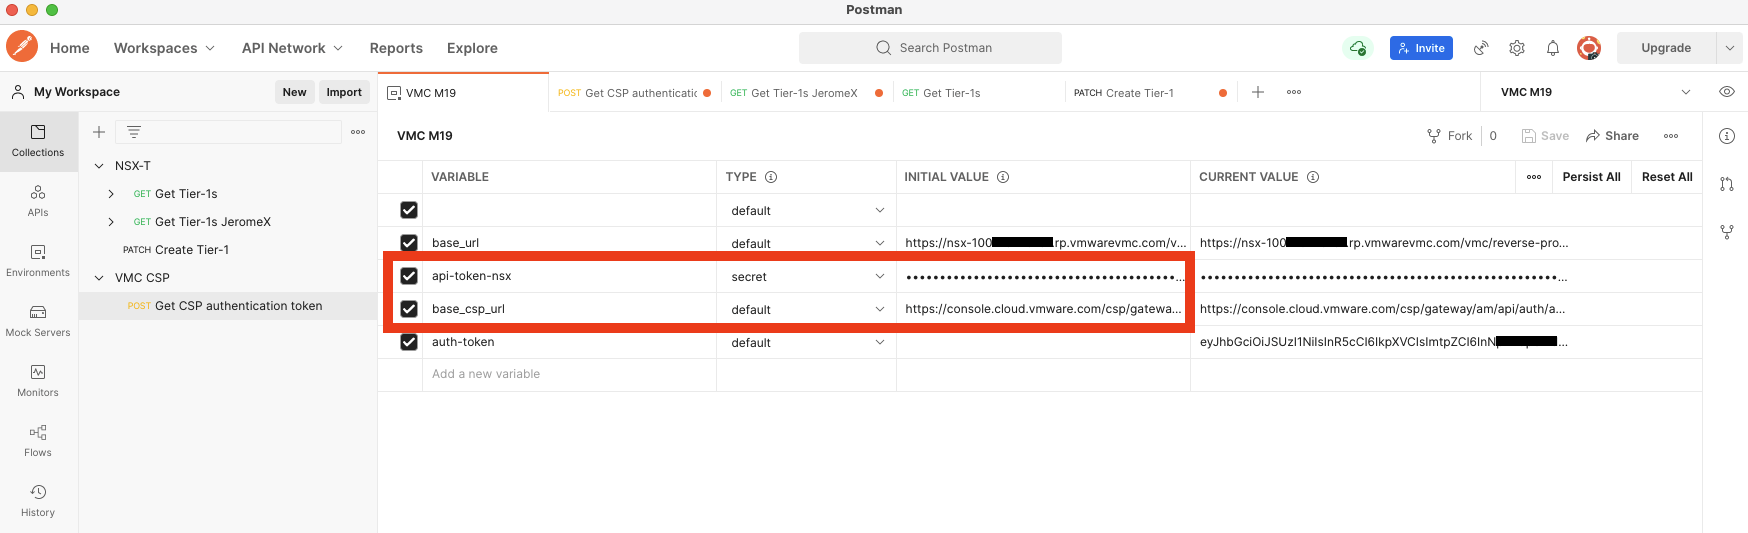
For the moment, we need two variables:
- base_csp_url, the URL we will use to get the authentication token,
"https://console.cloud.vmware.com/csp/gateway/am/api/auth/api-tokens/authorize" - api-token-nsx, this is the API token we just retrieved from the console
Then, we will create a POST API call to retrieve the authentication token:
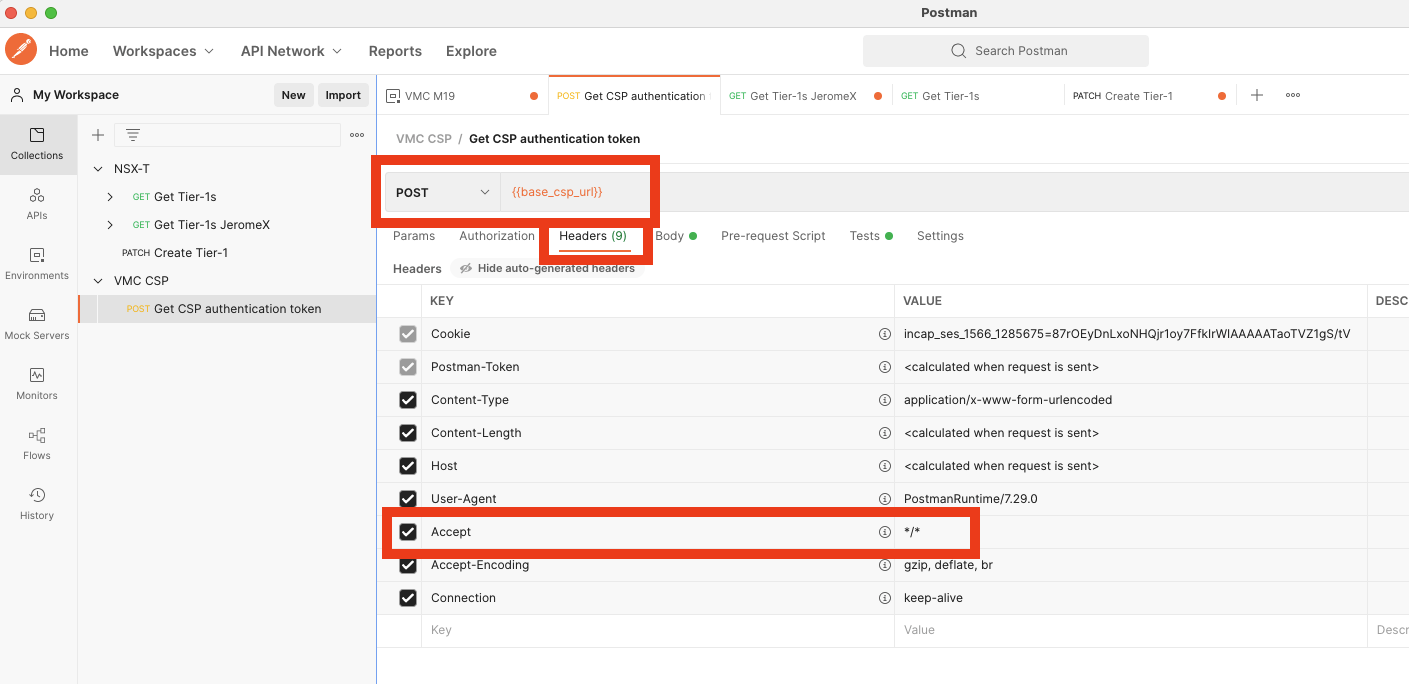
First it’s a POST request (yes I made the mistake thinking it was a GET…), use the base_csp_url environment variable, in the headers made sure you accept everything */*. Remember to set the environment to VMC for this API call in the top right corner.
In the body, use Content type “x-www-form-urlencoded” and add refresh_token key and the value is the API token, use the environment variable you set previously.
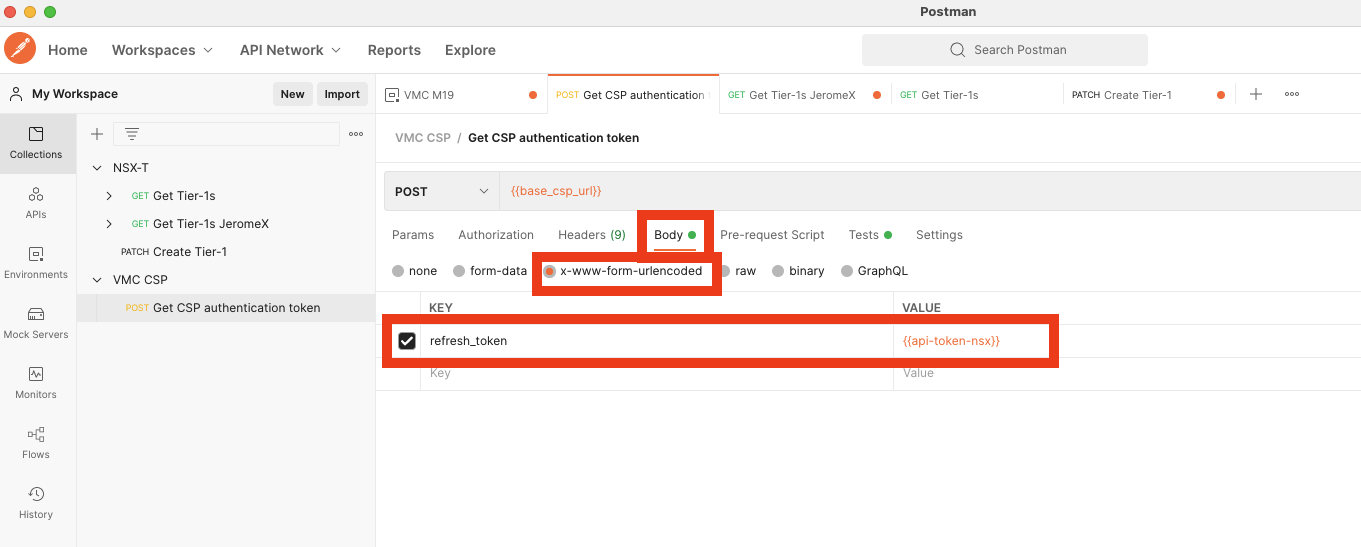
You can now click Send! You should receive something like that:
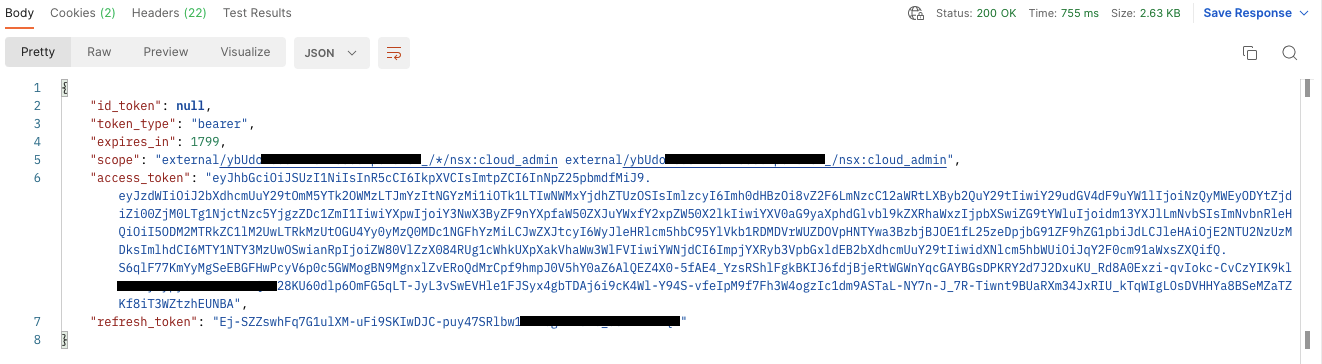
The access token is what you can use to do NSX API calls.
This is great, you can now do the NSX calls we are interested in, but it’s not convenient to copy/paste this token for each API call we want to do and this token expires after 30 minutes (1800 seconds as the API returns), so you will have to copy the new token every half an hour in all your API calls. Let’s try to find a solution to avoid that!
I see at least two solutions with Postman to be more convenient,
- one is to use a pre-request script, this will ask for the authentication token before each NSX API call. I tried that and for some encoding reason I could not make it work 🙁 If someone has done it successfully, I’m interested!
- I had to find another solution that has the advantage to avoid to ask for the authentication token for each and every API call. We will ask for the authentication token and store it in an environment variable that all the other API will refer to. We will have to run the API call every 30 minutes, but I don’t see that as a problem.
To do so, add another environment variable for VMC in Postman:
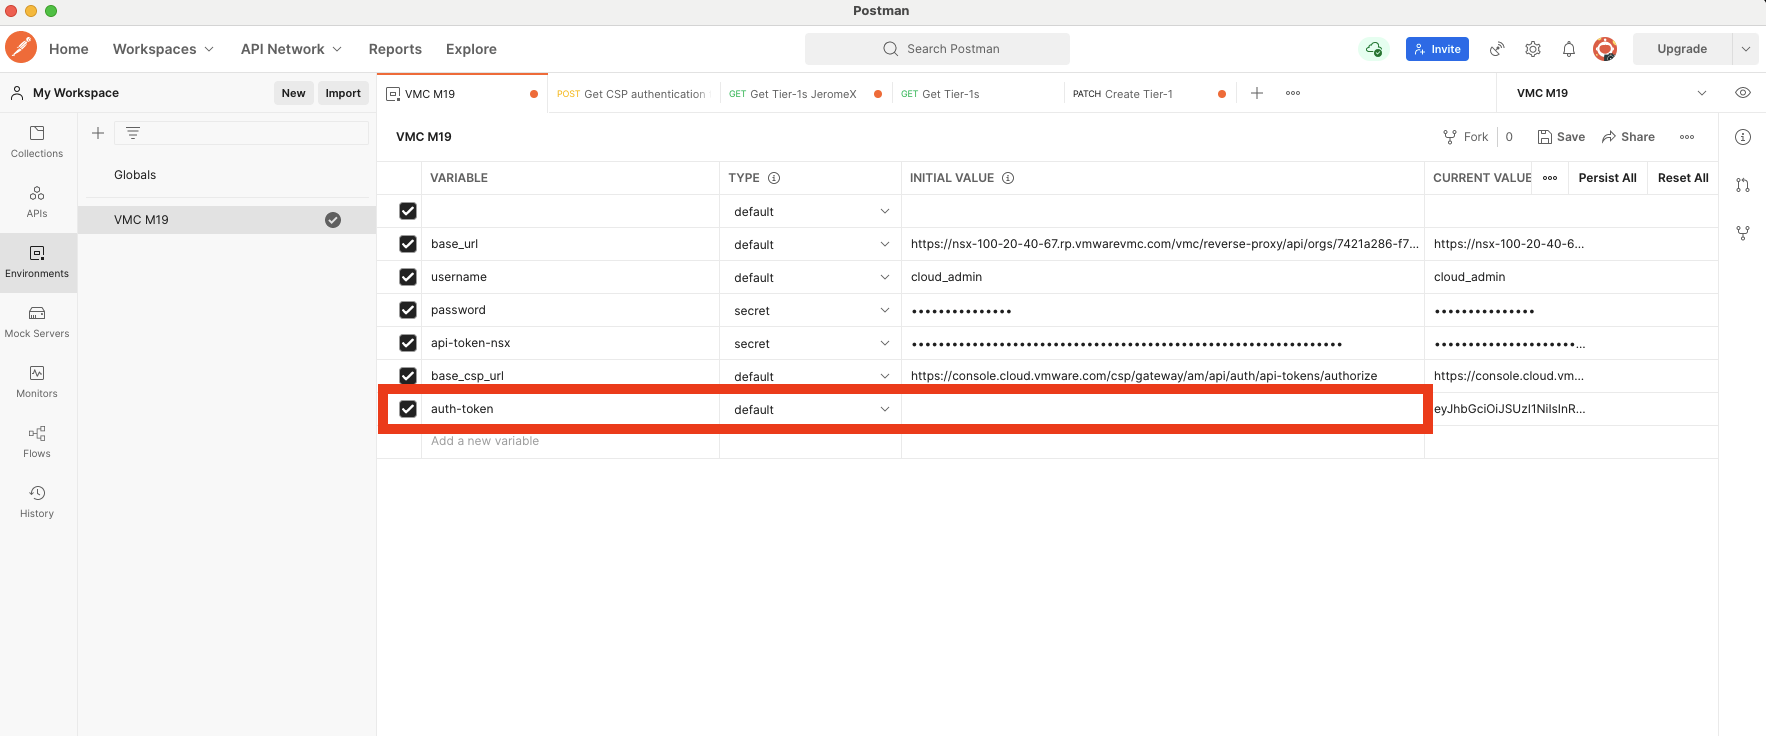
This is just an environment variable without value for the moment, our previously created POST call will set that variable.
Go back to the POST API call and add a script in the test tab:
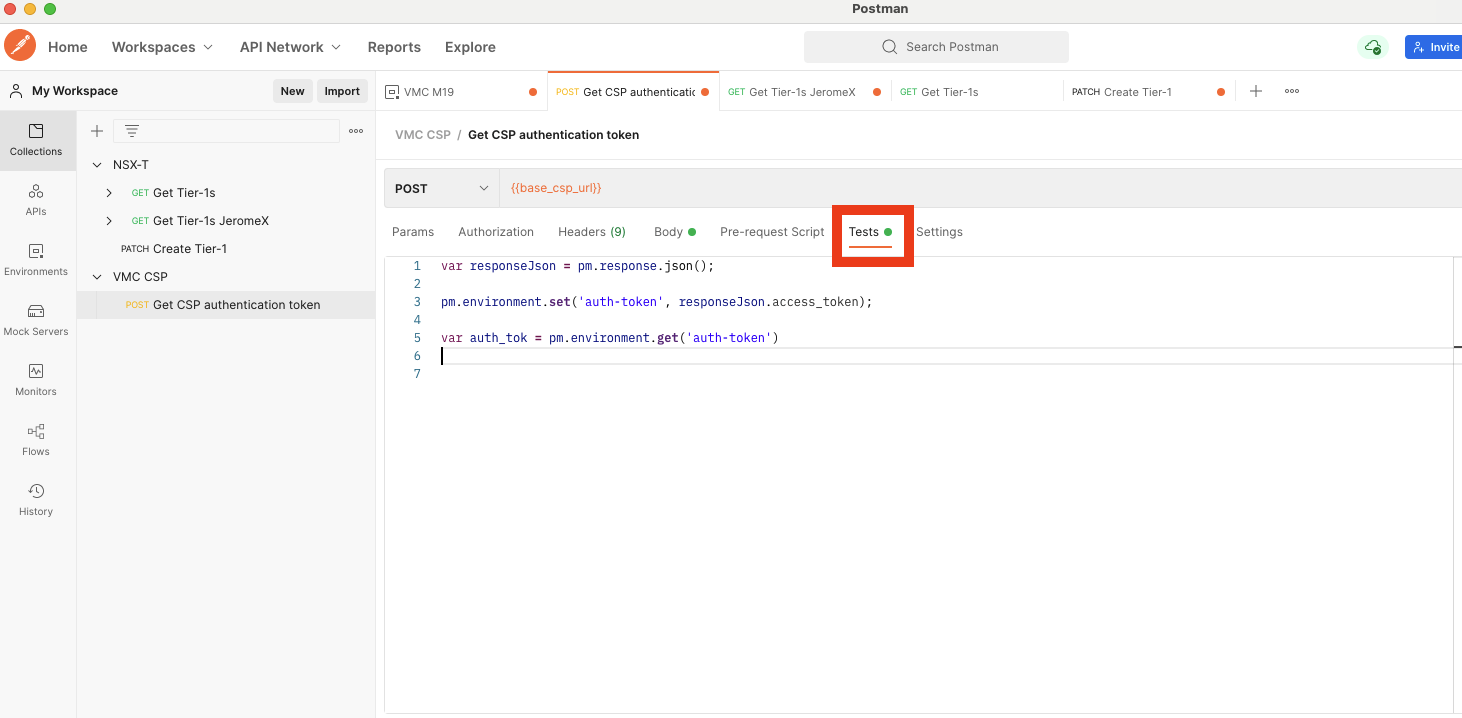
Here is the simple code:
var responseJson = pm.response.json();

pm.environment.set('auth-token', responseJson.access_token);
Now each time you will run this POST API, it will automatically set the environment variable {{auth-token}}.
3. NSX API call on VMC
We are finally ready to do NSX API call.
First you need to get the URL to reach the NSX manager from Internet. Go to your SDDC console and click on Settings, you will get NSX Manager URLs, copy the public URL:
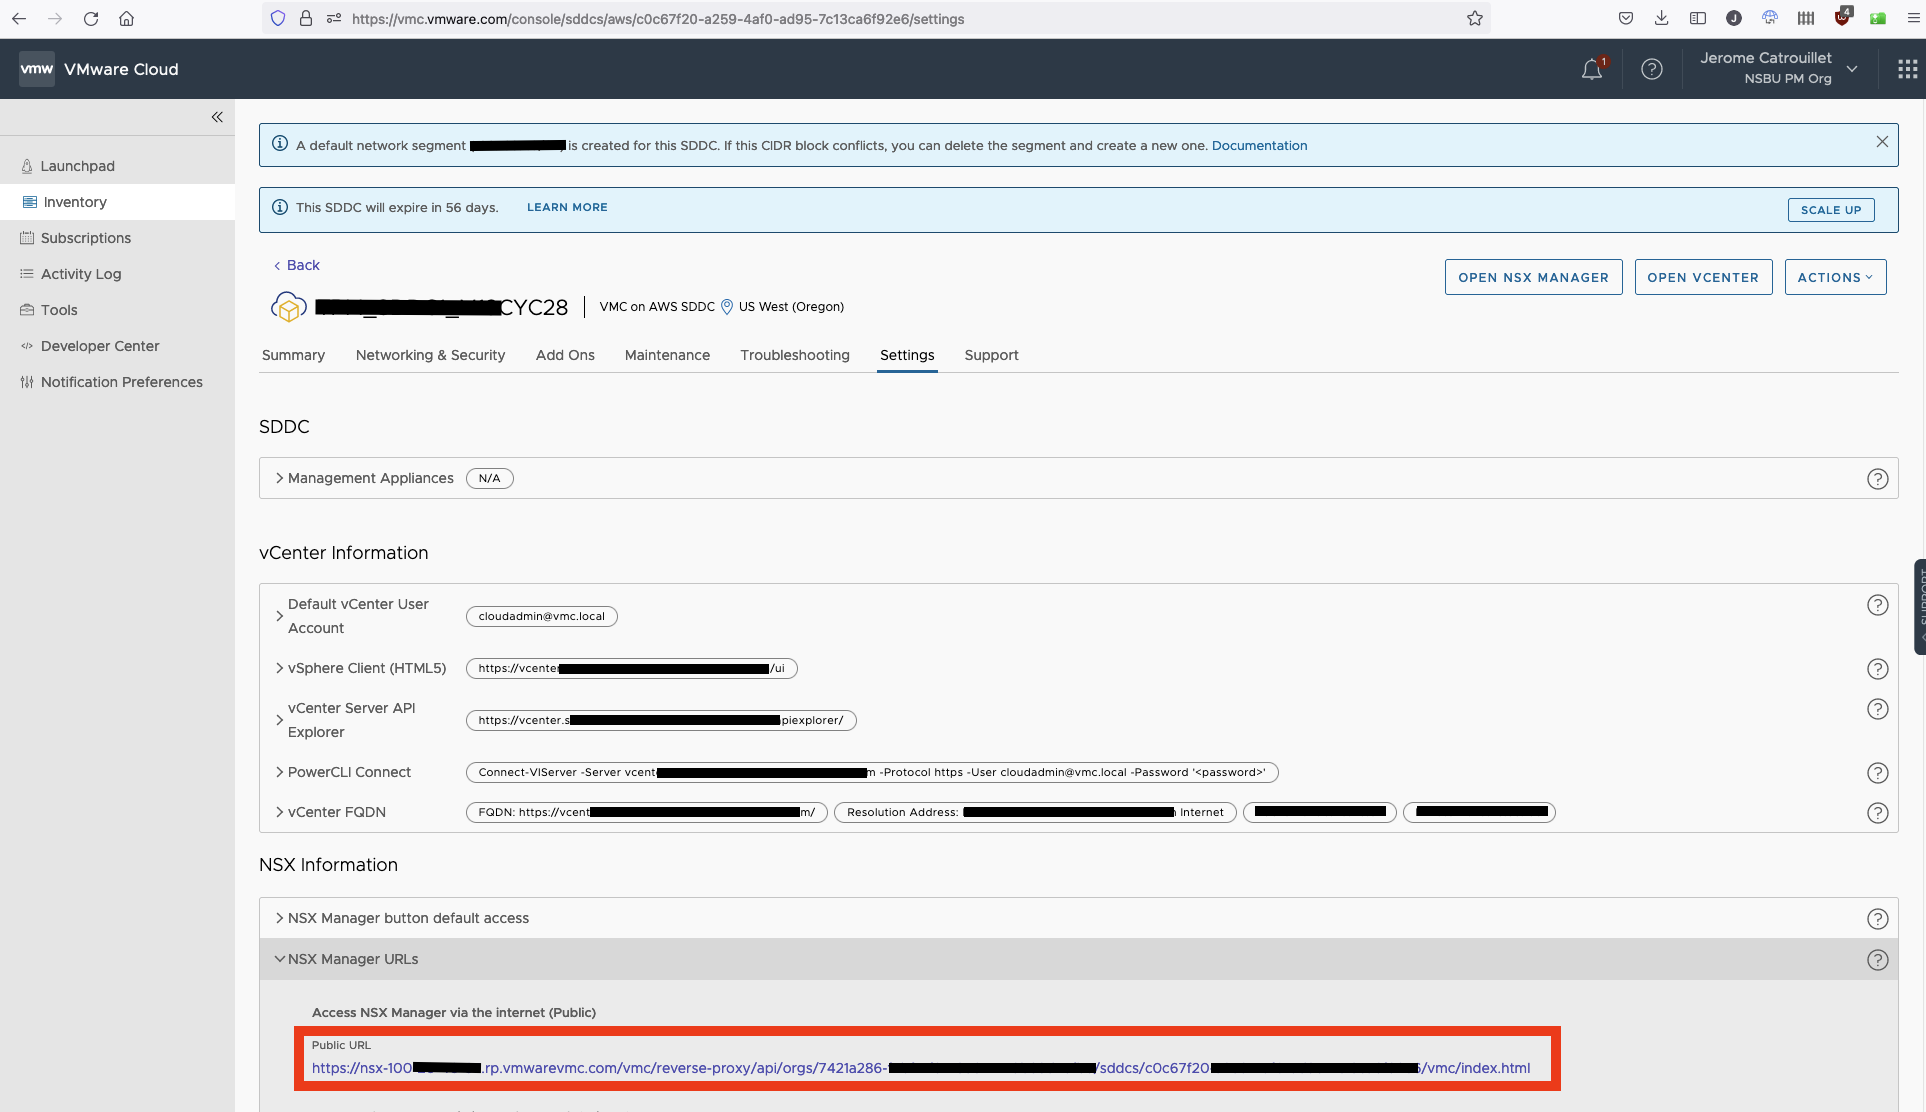
The correct NSX Manager URL for API call is in this format: https://nsx-<IP>.rp.vmwarevmc.com/vmc/reverse-proxy/api/orgs/<org-id>/sddcs/<sddc-id>/sks-nsxt-manager
Go back to Postman and create another environment variable with this URL:
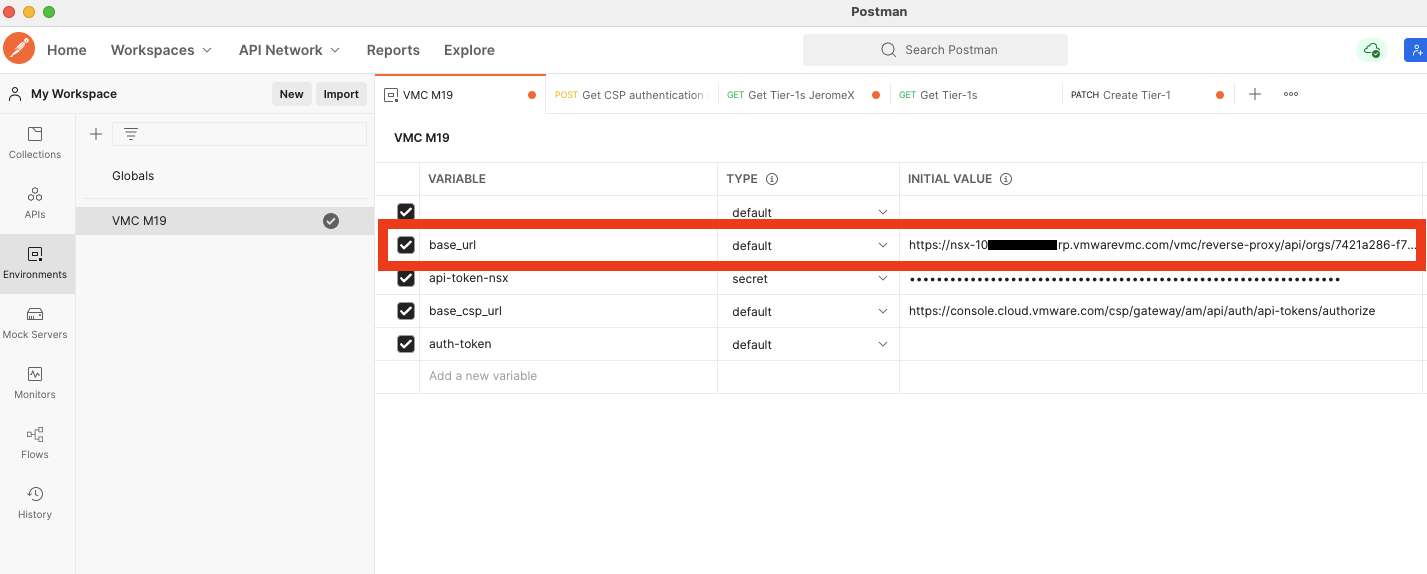
You can now create the NSX API call, in this example I just want to get the list of the Tier-1 gateways. Apply the VMC environment to this call, in the call itself set the URL to the environment variable we just set suffixed by the object you want to retrieve, in the headers create a variable named csp-auth-token and its value is the authentication token set by the previous API call {{auth-token}}.

You can send this request and you should receive a nice 200 OK with the object you asked for.
Thank you to have read this post to the end, I hope it has helped you.